


This week has been a summer vacation (well, technically a staycation 🏡) for me, so I thought it would be fun to share some easy summer doodles you can use to summer-ize (get it? 😄) your planner or journal spreads!
They’re super beginner-friendly, and I’ve even included a quick step-by-step for each one — plus some extra little ideas along the way. You can use them as decoration, mood trackers, headers, or whatever else you like. After all, it’s your journal!
So without further ado, here are my five go-to doodles for adding a little sunshine to the page.
🖊️✨ Let’s draw together!
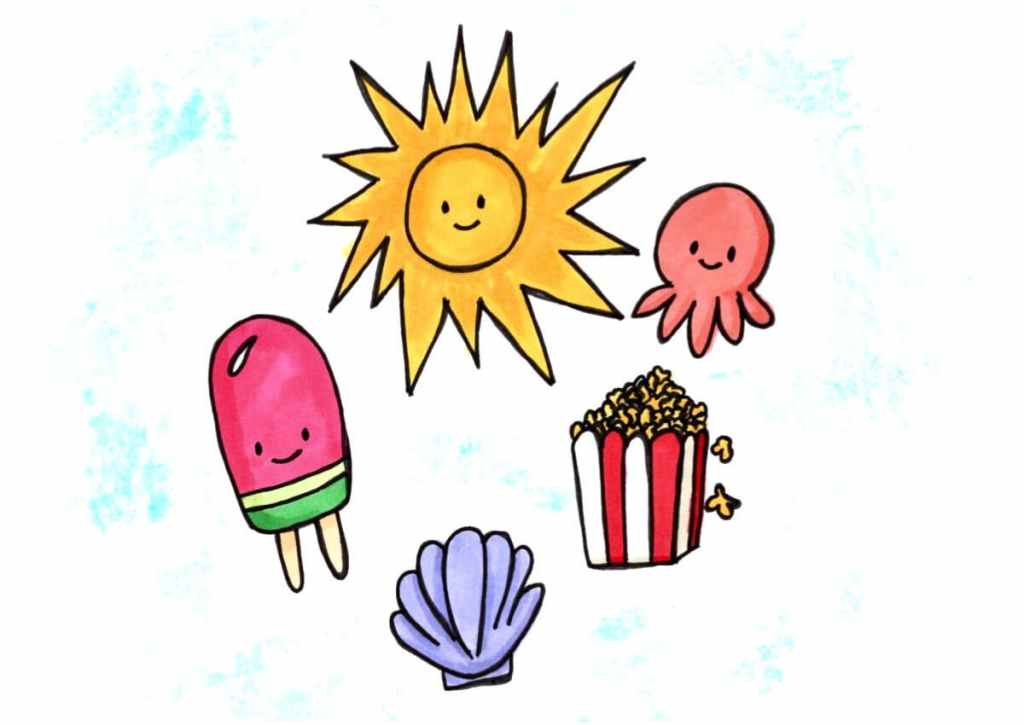
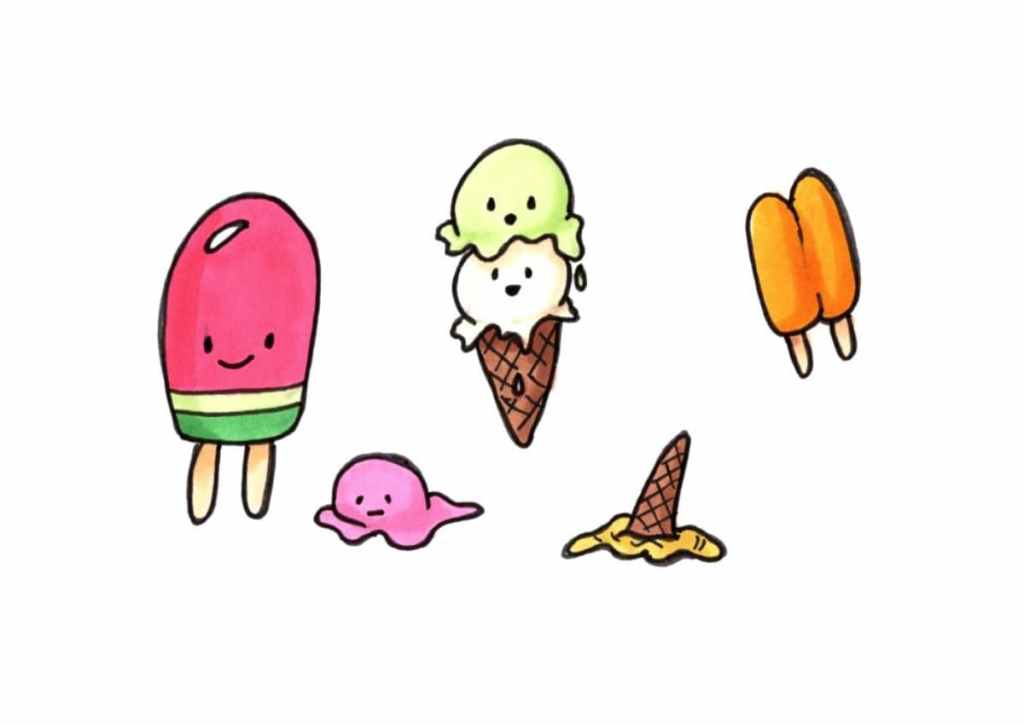
5 Summer Doodles 🌞🐙🍡🐚🍿
🌞 The Sun
Difficulty level: ☀️ – – – –
You’ll need: a pencil, an eraser, a smudge-free black pen, and a yellow marker or highlighter or coloring pencil (or two, if you want to add shading!)
The sun is one of the easiest summer doodles out there but the ultimate one when it comes to summer vibes!
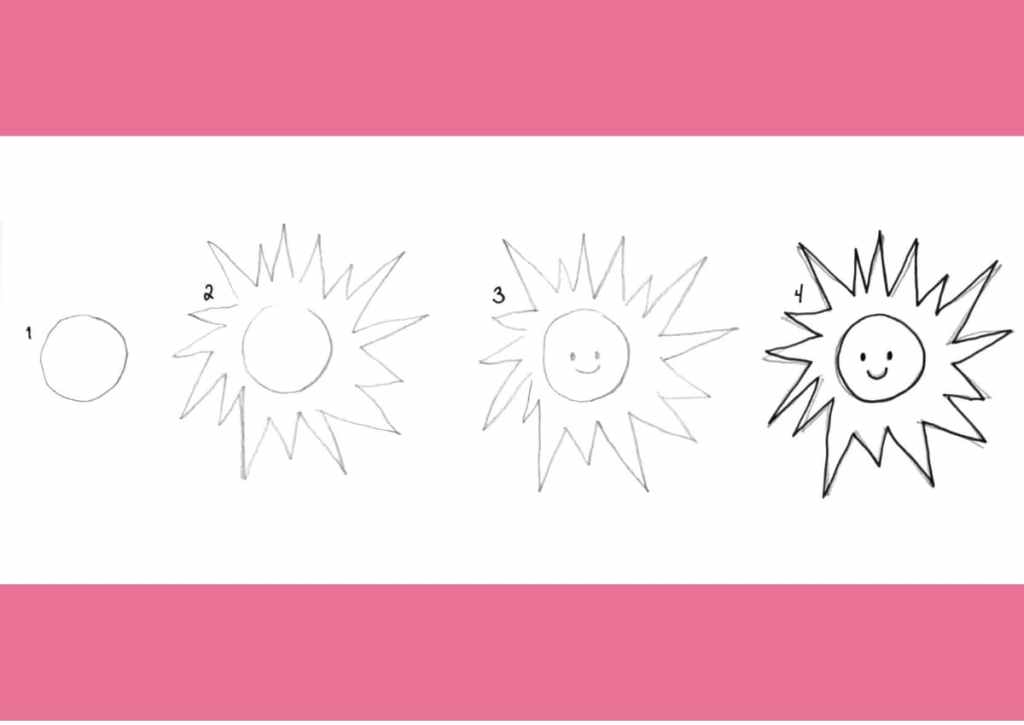
How to draw it:
Just start with a simple circle, then add your rays however you like — straight lines, spiky triangles, wiggly beams… it’s totally up to you. ✨
Want to add a touch of kawaii? Give your sun a tiny face (two dots and a mouth line) right in the center. 🌞
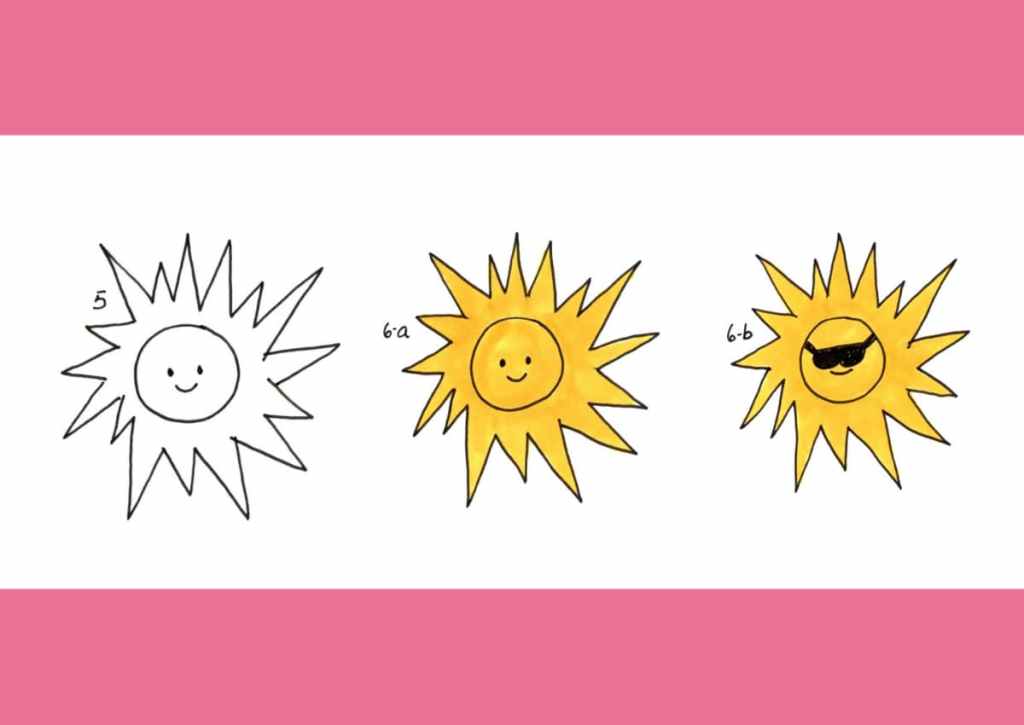
Want to “cool” it up? Give it some sunglasses — obviously. 😎 (Get it?? Sunglasses.)
🖍️ When it comes to coloring, I usually go for a warm yellow, but feel free to use whatever fits your spread. You can even add a darker yellow or orange for shading if you’re feeling fancy — but honestly, it’s totally optional.
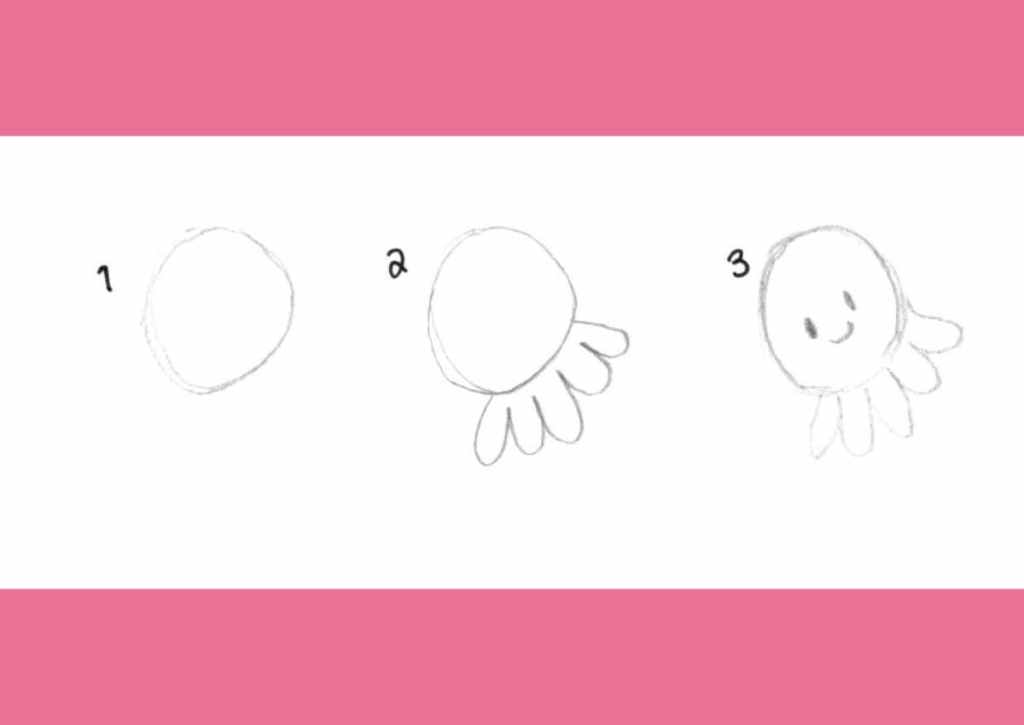
🐙 The Cute Octopus
Difficulty level: ☀️ – – – –
You’ll need: a pencil, an eraser, a smudge-free black pen, and one or two markers or coloring pencils — I like warm pink, but you can go with any color you like!
The cute octopus is a little like the sun, drawing-wise — but extra kawaii and perfect for adding under-the-sea vibes to your spread. 💦
How to draw it:
Start with a simple circle, then add tentacles flowing out from the bottom. I usually go with an odd number of tentacles (5 or 7) — it just feels more balanced and visually satisfying. ✏️✨
As always, a tiny face (two dots and a mouth line) in the center makes it extra cute! 💕
🖍️ Color it in, add a bit of shading if you like — and if you’re feeling fancy, try adding a few wavy blue lines in the background for an easy ocean effect! 🌊


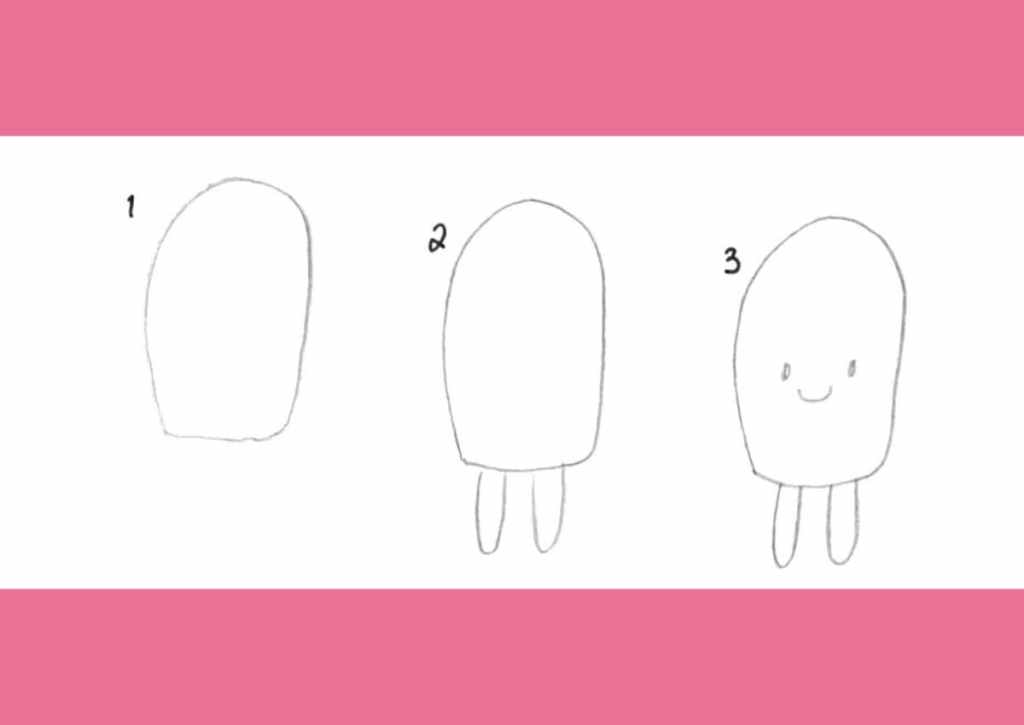
🍡The Posicle
Difficulty level: ☀️☀️ – – –
You’ll need: a pencil, an eraser, a smudge-free black pen, and one or two markers or coloring pencils in your favorite color — aka, your favorite flavor! 🍓🍇🍌
What better doodle to capture hot summer days than a popsicle? It’s just a tiny step up from the sun and the octopus, but still totally beginner-friendly — and super flexible, since you can customize the colors to match any spread. ✨
How to draw it:
Start with a rectangle, and round off the corners. Then add a half-circle at the top (for that classic soft popsicle look), and draw two little sticks at the bottom. 🍡
A tiny face (two dots and a mouth line) makes it even cuter! 💕
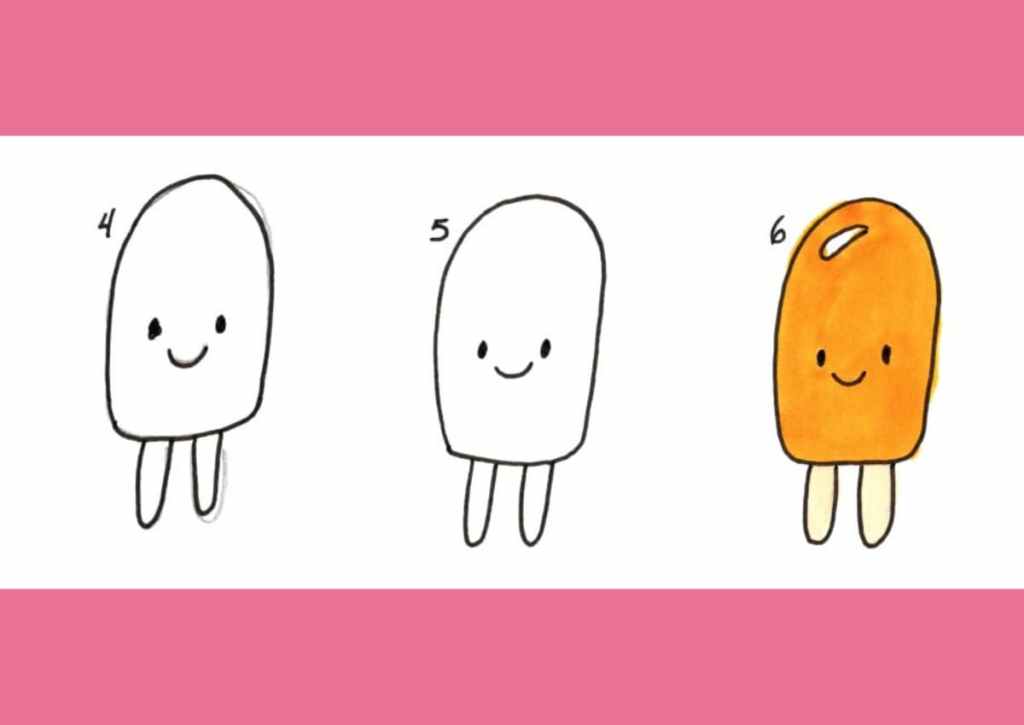
🖍️ Color it however you like — orange for orange 🍊, purple for grape 🍇, yellow for banana 🍌… or something wild like watermelon or rainbow swirl! Add a little shading for extra pop, or keep it simple and sweet.
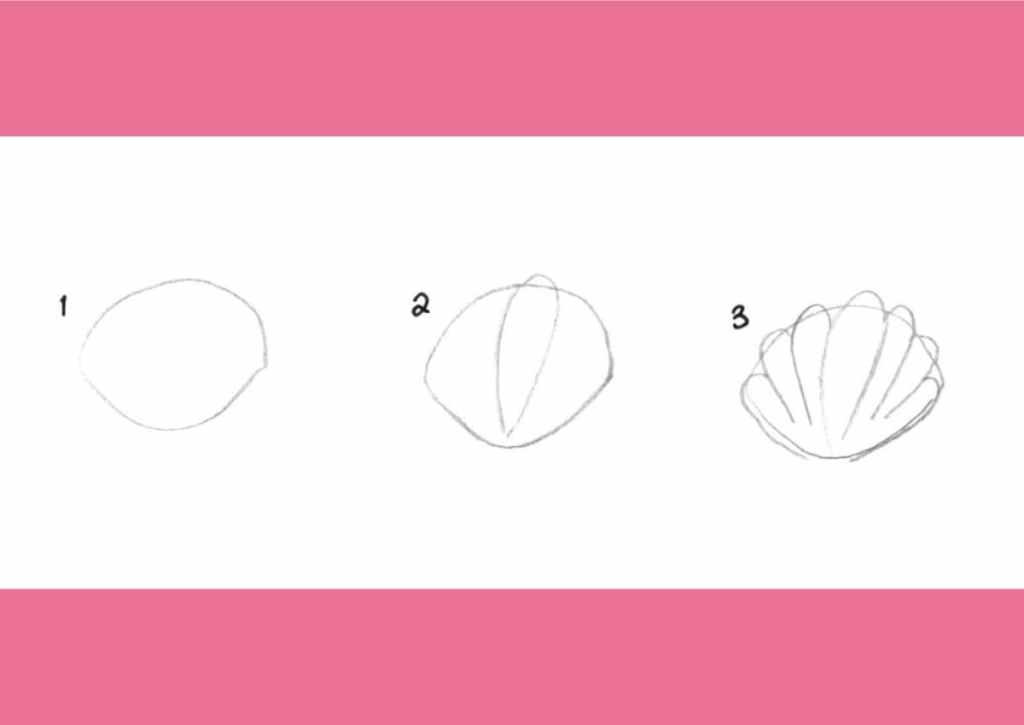
🐚 The Seashell
Difficulty level: ☀️☀️☀️ – –
You’ll need: a pencil, an eraser, a smudge-free black pen, and one or two colors in soft shell tones like pink, sandy beige, or light brown — plus a slightly darker shade for shading.
Next stop: the beach! 🏖️ And besides water, sand, and crowds of tourists, one thing you’re almost guaranteed to find? Seashells! 🐚 This doodle is a little step up in difficulty, but still totally doable — and very satisfying to draw.
How to draw it:
Start by drawing a very wide “V” with a rounded bottom. Then connect the top points of the V with a smooth arch — that’s your basic shell shape.
Now for the fun part: draw a very elongated, upside-down teardrop shape starting from the bottom point of the V. Curve it up toward the top arch, then back down again to meet the bottom — this creates that scalloped center. And don’t worry if you’re elongated shape reaches a bit beyond your basic shell shape: we’re doodlers, not architects! 😊🖊️📐
Next, add half-drop shapes on either side of the middle one, going smaller as you move outward. Two or three on each side is plenty!
Finally, draw a small rectangle at the base of the shell — like you’re wrapping the bottom of the V.
Add a small face (two dots and a mouth line) at the center if you want to kawaii it up! 💕
🖍️ For coloring, go with whatever shell shade you picked, and use your darker color to add shading along the vertical teardrop shapes. That’s it — you’ve got a summery shell that’s ready for your beach-themed spread!

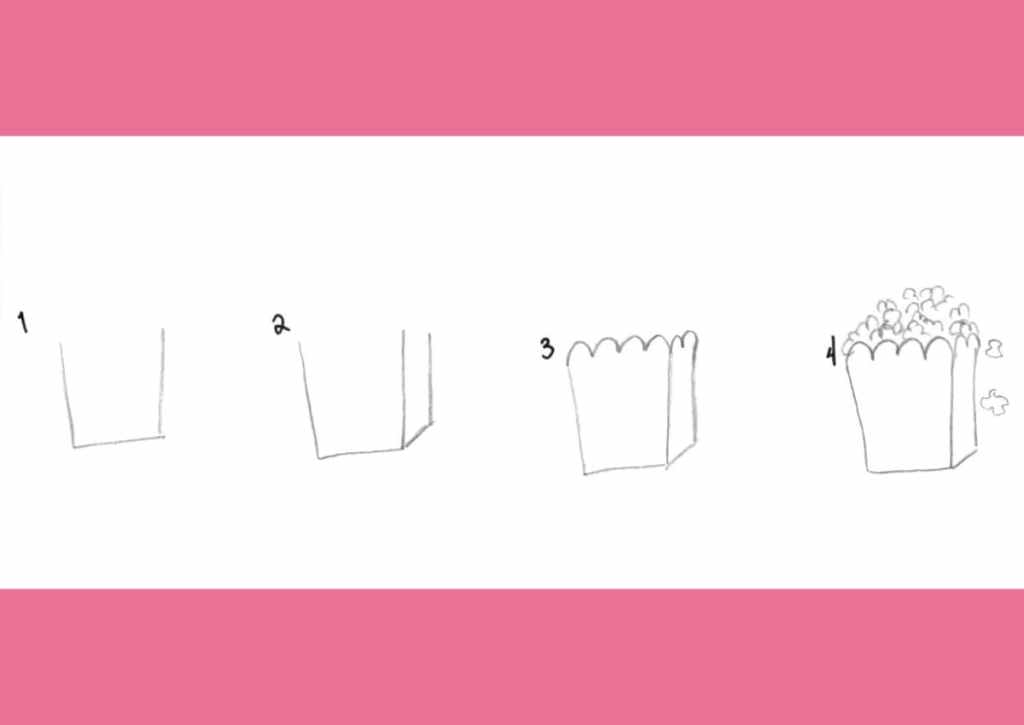
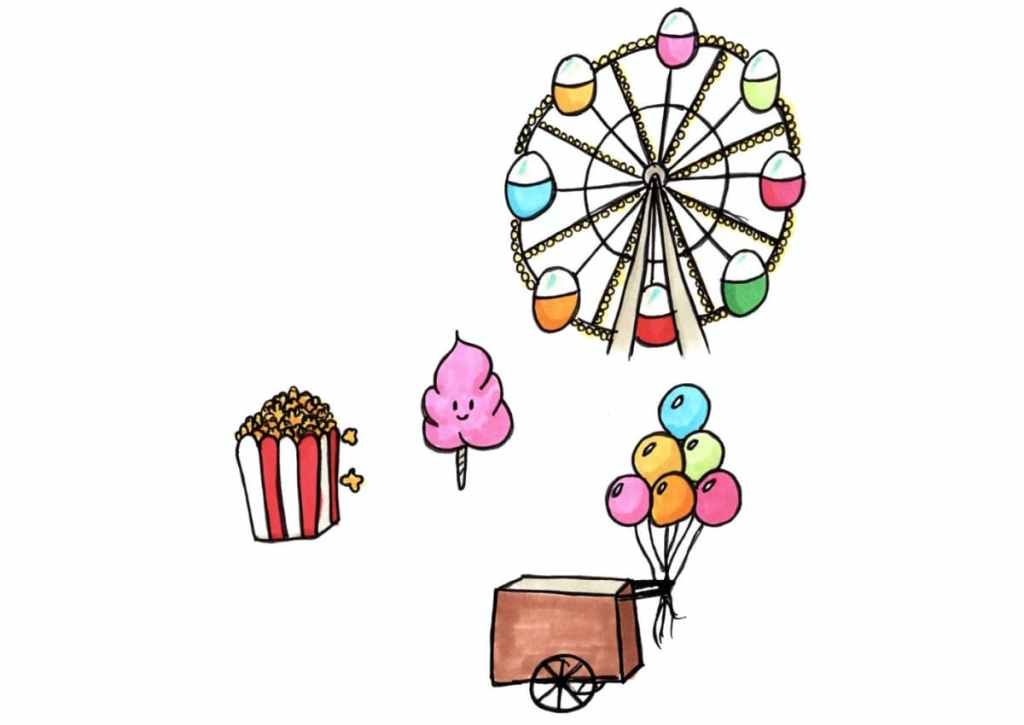
🍿 The Popcorn
Difficulty level: ☀️☀️☀️☀️ –
You’ll need: a pencil, an eraser, a smudge-free black pen, and two colors: red and yellow. You can also use a darker shade of each for shading, plus a light gray for depth (you can totally use your drawing pencil for that one).
A day at the summer fair wouldn’t be complete without a box of popcorn… unless you’re more of a cotton candy fan? 🍬😉
This doodle is a little more advanced and takes a bit of patience (especially for the popcorn part), but it’s so visually rewarding!
How to draw it:
- Start with a squarish “U” shape — make the top a little wider than the bottom.
- From one bottom corner, draw a short line (about 1/3 the length of the U’s bottom) going slightly upward and to the side for that 3D box effect.
- From the end of that line, go straight up to match the height of the U’s sides.
- Connect the two top points of the U with a bouncy, wavy line — this is the top of the popcorn box!
- Then do the same with the side line (smaller bounces here).
- From each “dip” in the bouncy line, draw a line straight down to the box base for that striped popcorn box look. 🍿✔️
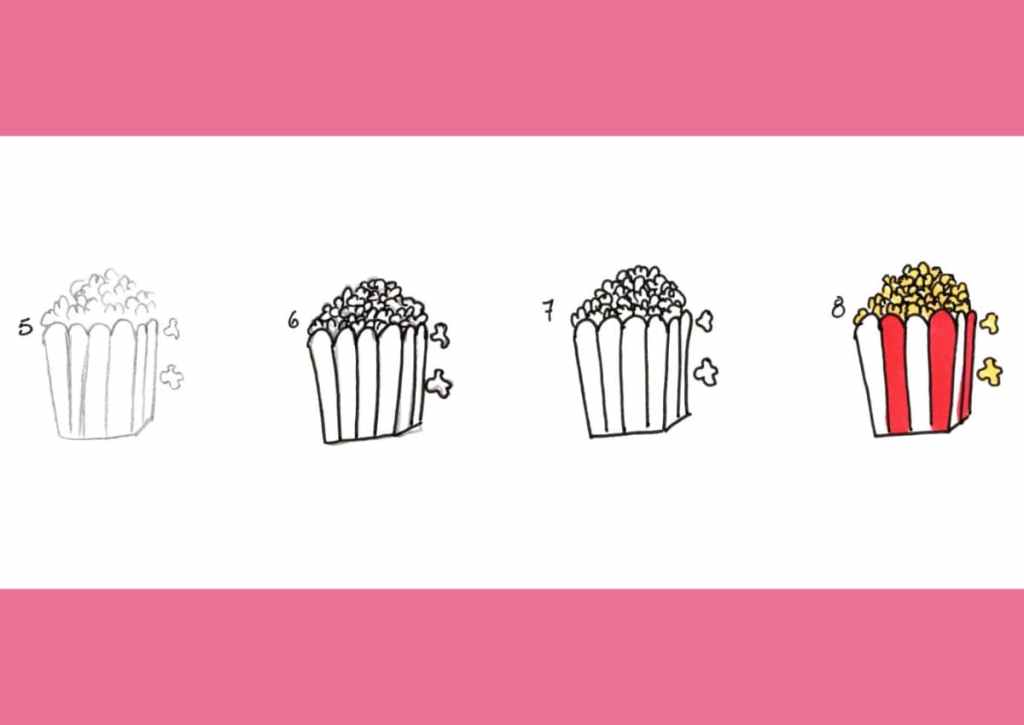
Now for the fun part: draw the popcorn! Use bouncy lines, wavy blobs, overlapping half-circles — just go with the popcorny flow! 😄
Want to add some kawaii charm? Give your box a tiny smiling face! 🥰
Feeling fancy? Add the word “Popcorn” to the front of the box in a fun, bubbly font for extra flair! 🎉🖋️
🖍️ Color time!
Use yellow for the popcorn (of course!) and red for every other vertical stripe on the box. Add a little shading with gray or darker tones if you like — especially on the side of the box or in the popcorn creases.
And that’s it — your summer fair snack is ready for the page! 🎡📓
✏️ Some Doodling Tips
I’m definitely not an expert or professional when it comes to drawing or doodling — but after doing it for a while, I’ve picked up a few little lessons I wish I had learned sooner. So here are a few tips from me to you:
🌟 Turn your page — Don’t hesitate to rotate your journal or planner if it makes things easier to draw. Tilt it, flip it — whatever helps your hand flow naturally!
🖊️ Retrace your outlines — After you’ve finished coloring, go back over your black lines to give your doodle a sharper, crisper look.
💡 Pick a light source — When shading, choose a direction where the light is coming from, and stick to it. It’ll make your doodles feel a little more dimensional without much extra effort!
💸 Tools are fun, but not required — Having high-end tools like brush pens, fancy markers, or archival fineliners can be a great investment if you doodle often… but they’re totally not a must. Use what you have, and upgrade only if it feels right for you.
🧘♀️ Relax — Doodling isn’t about perfection; it’s about expression. So have fun with it!💕
💫 That’s a Wrap!
I hope these summer doodles bring a little sunshine to your journal or planner! 🌞
Whether you’re a beginner or a seasoned sketcher, there’s no wrong way to get creative.
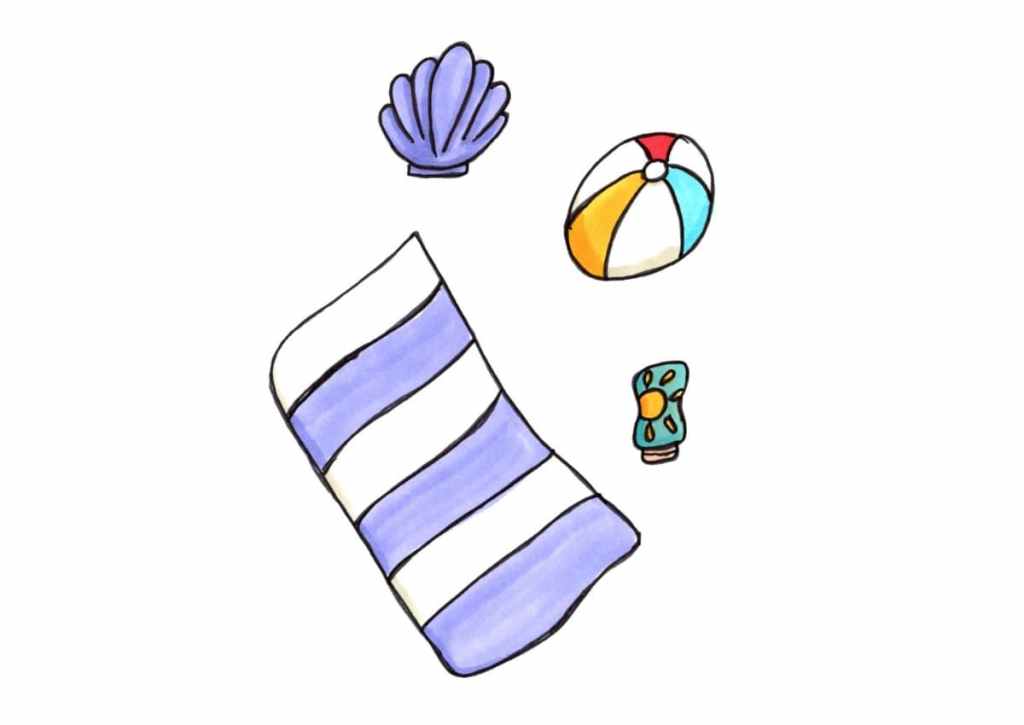
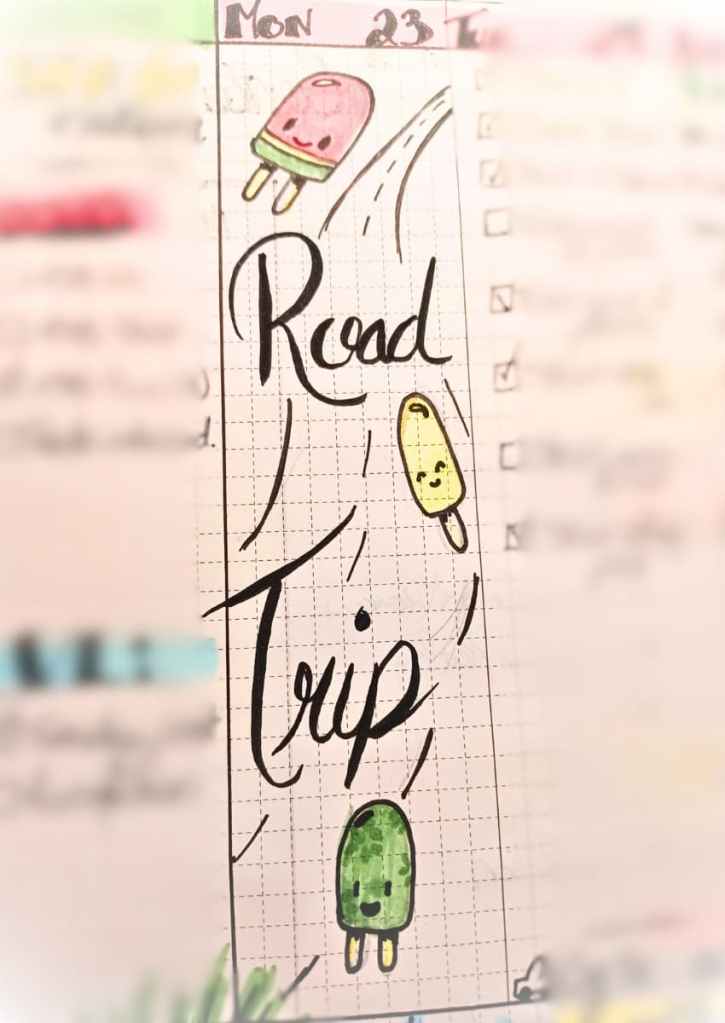
✨ Here’s a peek at how I used some of them in my own planner. (That’s my planner spread for this week.)
If you try any of these doodles, I’d love to see them — please tag me so I can cheer you on! 💌🎨
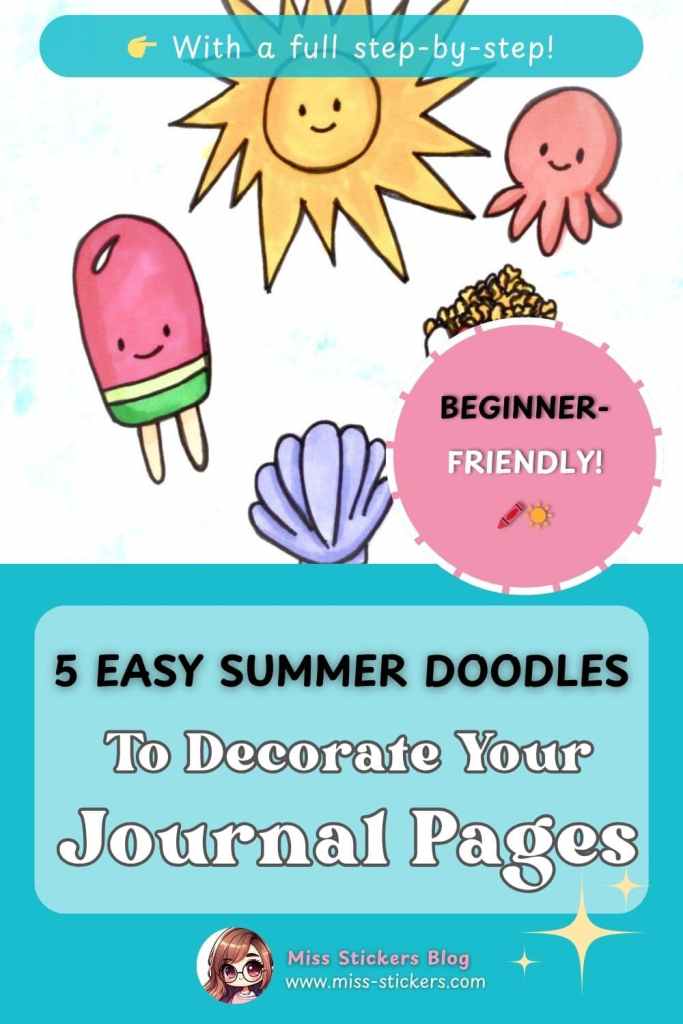
📌 And if you’d like to save this post for later, there’s a Pinterest-friendly image just below!


Leave a comment